How to weave a harakeke whetu (flax star) for Matariki
The day I met Bethany Edmunds at the Auckland Museum there was a brilliant display of winter sunlight. It was a southerly and there were clear skies as far as the eye could see. This meeting was to be a revelation in more ways than one. In her role as Youth Outreach Programmer at the museum, Bethany had been entrusted with the responsibility of teaching me to weave a harakeke whetu (flax star) for Matariki and on a personal level, we were probably related as our families hailed from neighbouring sleepy hamlets in the Far North.
If you’re keen to make your own stars, there are a few things to consider before you hijack all the harakeke in your garden. Respect is the keyword. First, you must give thanks to the plant and also to Tane Mahuta and his bevy of wives who, in Maori myth, were responsible for the natural world.
Bethany instructed me in the correct way to cut the flax, which involved harvesting only the outside spears and leaving the “rito” (baby) and awhi-rito (parents) in the middle so the plant can rejuvenate. Spears should be cut from the outside in and cuts should be angled away from the plant to allow rain to run away from the apex of the plant. This contributes to its on-going health and well-being. Flax should not be harvested when it’s raining, at night or during menstruation. All offcuts and unused flax should be returned to the plant of origin.
Step 1 – You will need four weaving strands (wha whenu). Start with two rau (leaves/spears). Fold the spear over, shiny sides facing. Insert your thumb nail approx 5mm from inner rib and pierce the flax. Run your thumb nail up the edge from the bottom, stripping the edge off. Repeat with outer edge. Run your thumb between the two halves to divide the spear in half. Trim some of the woody excess from the bottom with a blade. Repeat with other spear so that you have four lengths.
Step 2 – Trim to 2.5mm wide. Scrape dull side with butter knife three times to make more flexible. (Start from the middle working out to both ends.) Top and tail.
Step 3 – Windmill knot
a) Take one set and hold vertically just shy of the mid-way point with your left hand. Wrap once around your hand in a downward motion.
b) Take the other top and tailed set and, holding at the same point midway along their length, slide them horizontally between the two sections in your hand.
c) Wrap the right hand end of the horizontal set, in a left to right direction around the back of your hand and back over the left sided vertical strands.
d) Insert through the top right side loop. Now carefully pull all the ends and remove your hand. This is a windmill knot.
Turn the knot over.
Step 4
a) Starting at top right corner, fold top whenu down over knot. Repeat in clockwise direction, tucking fourth under the first. There should now be two strips at each side.
b) Start with top left strip. Fold backwards at 45 degrees. Fold forwards to make another 45 degree angle. Fold both together and push tail through loop below. Repeat for other left points.
c) Turn star over and make points in same way on this side.
d) Trim excess with a blade and gift to friends and family.
Happy Matariki!
NZ Herald

PROFILE
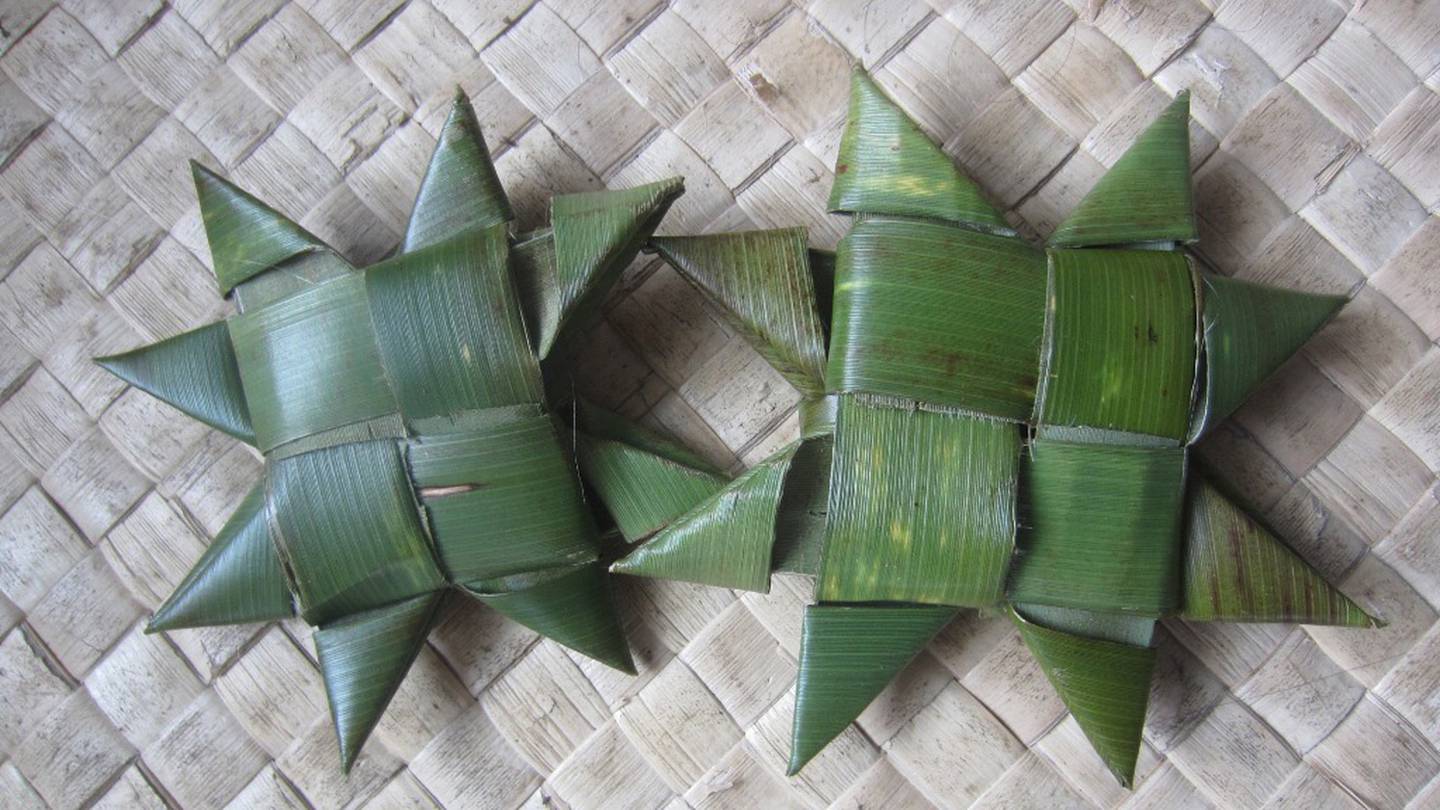
Craft Matariki Flax Stars.
Herald on Sunday – New Zealand
By: Anna Subritzky
Main Research Source
- Craft: Ties that bind(22/06/2013)