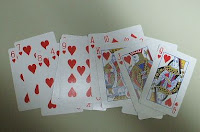
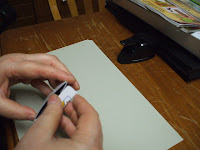
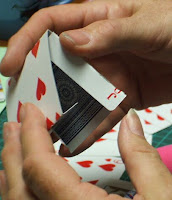
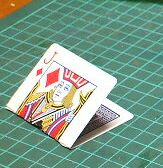
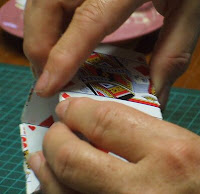
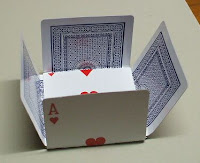
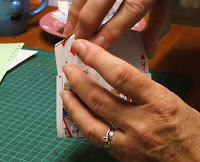
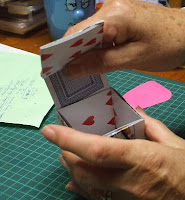
Playing Card Box Tutorial

They really are very easy to do ….. thanks to my friend Gai for being the model for the majority of the photo’s 😉

1. To start you need to select 21 playing cards, keep in mind when you are selecting these what you would like to see around the front of the box this is important. Also some playing cards are better than others ..... older ones may be better ... yesterday when we used new playing cards to make the one for these photos, the playing card did crack a little while bending the cards ..... none of of previous ones have done this. Also look around for different sized playing cards .......... there are soooo many different sizes to pick from .... the ones here are the standard sized card.
2. You now have to separate from the 21 playing cards, 12 that you want to use to make the main section of the box ..... these will be seen ............ 6 of these will be for the inside of the box and the other 6 for the outside (including the base & the lid) Take 2 cards (one will be the outside image and the other the inside). And place them on top of each other so that they appear in the photo on the left . the back of the playing cards should be facing each other and they cards are in a cross shape.
3. Take the pieces which are on either side of the card and fold them over so they are onto of the card on the top.
4. Now turn the cards over and fold over the pieces that are on the edge over to that card too. As per photo.
5. Pull the pieces apart and then take each fold over piece and slide it into the card as you see on the photo. Repeat this with the other 10 playing cards, you will then have 6 folded pieces which will make the main portion of your box.
6. Fold all the remaining playing cards in half so they look like this.
7. Now take one of the playing cards you folded in half and slide it down into one of the other playing cards you created using the 2 playing cards. This is how you will join the pieces to make the box.
8. Continue joining the sides of the box first.
9. Slide in 4 of the folded cards to the card that is to be the base of the box. Here you see the base of the box ready to attach to the box sides.
10. Slide all the pieces into the bottom slots around the box .
11. To create the lid, slide one of the folded playing cards to the back of the lid and then slide it into the box as show in the photos below.
12. Embellish your boxes how you wish. In the box shown here I have used a white gel pen to create dots on the black shapes and a black marker on the red shapes of the card. If you which to add brads, you might want to work out where you which this to go and then pull that part of the box apart temporarily while you create your hole so the back of the brad is not seen on the inside.

Stamp Owl’s Studio

PROFILE

StampOwl’s Studio Blog is a personal hobby blog with the purpose of sharing paper crafting projects.

Frances Byrne is a stamper from ‘downunder’ Australia.

Main Research Source
What have we learnt?

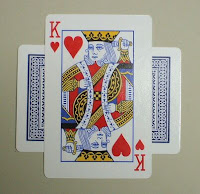
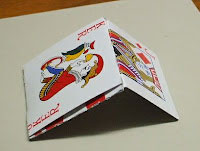
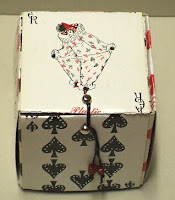
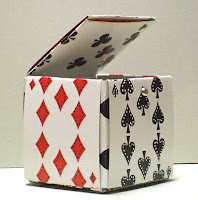
I love the simplicity of this – no measuring, no cutting, no glue. Just a clever reuse for a deck of cards short of a card or two.

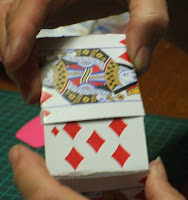
It does need a brad or eyelet to finish it off. Or maybe reclaimed beads would give enough weight to hold the lid down?

Top