Recycled Crafts
I have been making crafts out of recycled materials as long as I can remember. At one point in my childhood it was an obsession: plastic bottles became dolls, shoeboxes became houses, and little figurines that came in the box of macaroni turned into statues in a miniature village which eventually included a Ferris wheel with carriages made out of egg carton sections that completely blocked entry into the family room, much to my dad’s chagrin.
Today I still hoard used containers and interesting bits of decoration in the hopes of finding something to make out of them (although I do my best to leave room for other family members to maneuver). In fact, I’ve turned craft design into a side career. It started with homeschool projects with my own kids, and soon grew into afterschool classes, magazine articles and books.
This week, when schools are closed in my area for Winter Break, I’ll be presenting crafts programs at a couple of local libraries. But for all of you who are too far to come join us, I thought I’d share some recycled craft projects you can do at home.
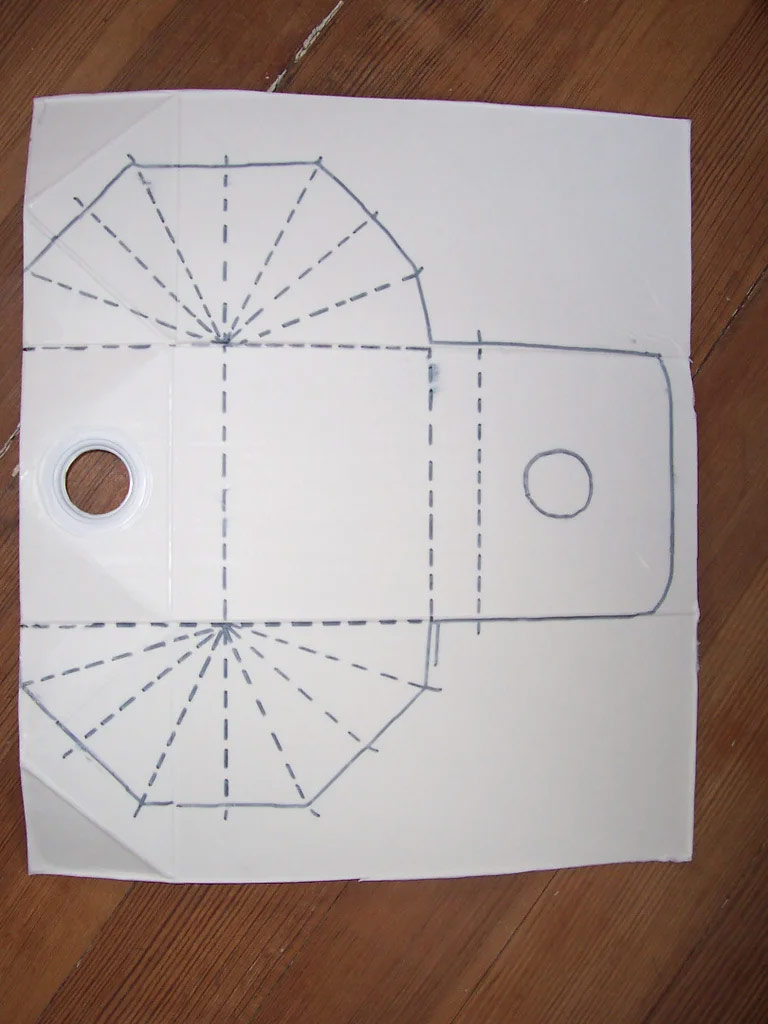
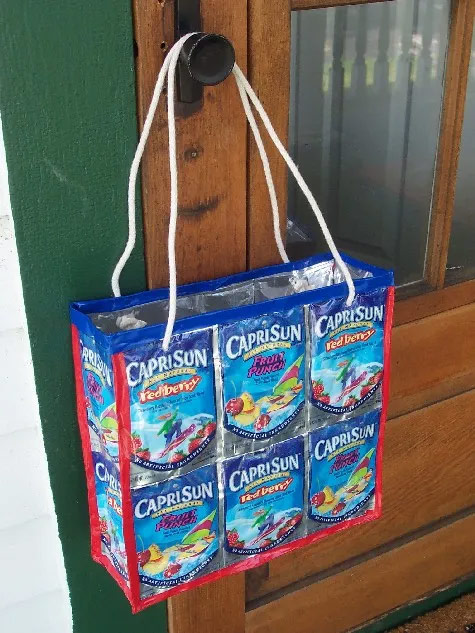
Here are directions for making the Juice Pouch Tote:
18 empty juice pouches
Clear packaging tape
Stapler
Colored ¾ inch electrical tape (to cover stapled seams)
hole puncher
rope, heavy yarn or clear plastic tubing
Clean pouches thoroughly by slitting open the bottoms and washing by hand or in the washing machine. Let dry. Be sure to remove the glue that holds on the straws and put a small piece of tape over the straw hole.
To make the front of the tote, lay out 6 pouches, 3 wide by 2 high. Overlap the edges and use packing tape (on both sides) to connect them. Do the same for the back piece.
Lay out the sides and bottom pieces by putting 2 pouches end to end. Adjust the length of the bottom to match the front and back (see step 2).
Attach the front to the sides and back by stapling the edges together. Cover the stapled seams with electrical tape. Do the same with the back.
For the handles, punch holes in the front and the back and thread the handle through. Tie a knot in the handle on the inside to secure.
Many of the crafts I’ve designed have appeared in publications FamilyFun and Home Education Magazine, and can still be found on their website. Here are a few:
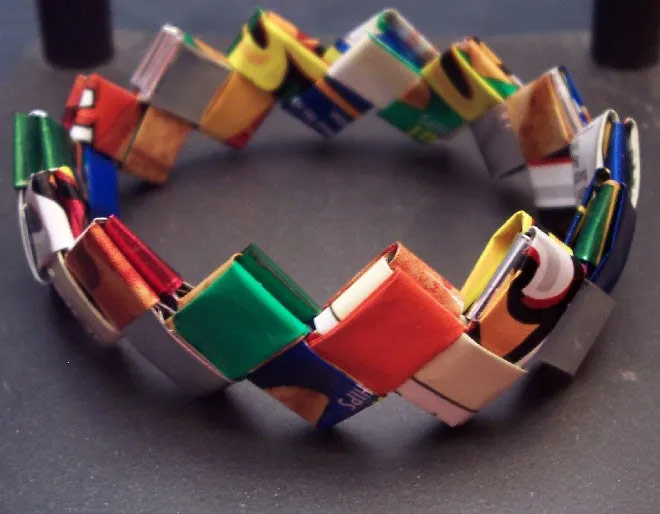
Snack Bag Bracelets — I saw fancy stores selling handbags made of snack bags and realized they were just like the gum wrapper bracelets we used to make in elementary school. Voila!
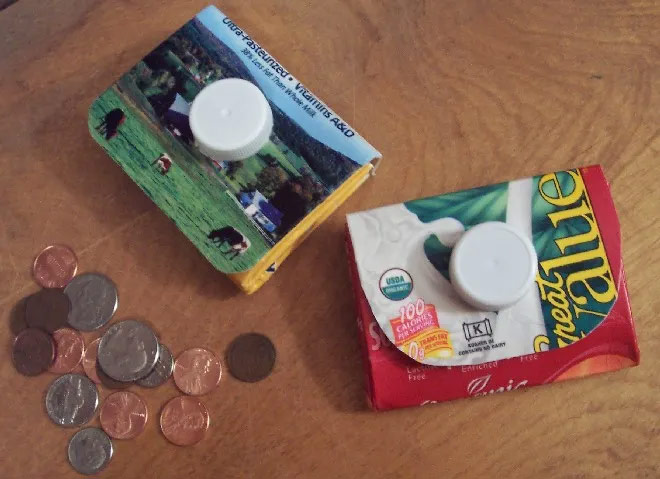
Milk Carton Change Purse — I also borrowed this idea from a wallet I saw in an upscale design store. Figuring out how to make it just by folding the carton was the real challenge! Be sure to print out the template and watch the video on the magazine’s website. Fruit punch, eggnog and organic milk cartons make particularly attractive purses.
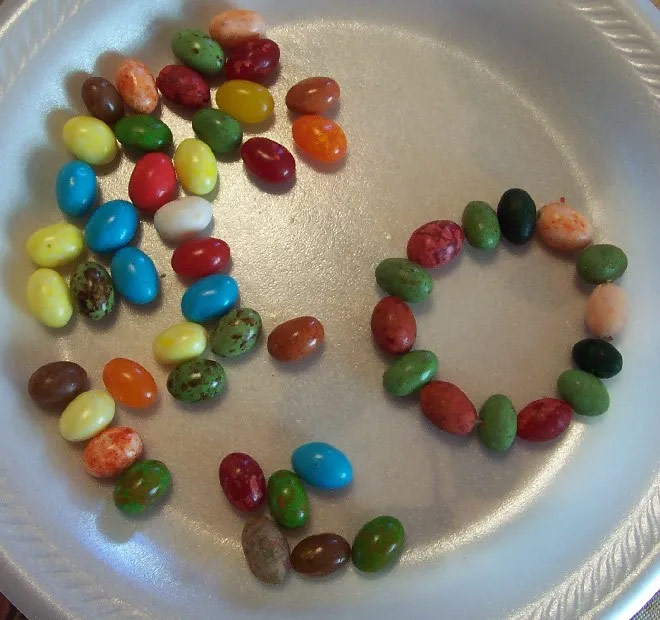
Jelly Bean Bracelets – I was inspired by the beautiful jewel-like colors of the gourmet jelly beans we bought at our local warehouse food store to make these fun bracelets. The blog post I’ve linked to actually has better instructions than the original magazine article — including the suggestion to keep a bowl of water nearby for cleaning off the needle when it gets too sticky. I used elastic thread, but button thread apparently works well too!
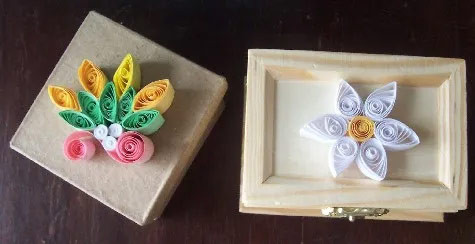
Quilling Paper Designs – I teach this craft, which uses rolled-up strips of paper, at 18th Century Fairs at local schools and historical sites. You can make it out of recycled copy paper (I usually have a nice supply of colors in my collection) or even construction paper. Parents have told me that their kids spend hours once they learn how to do it; one family came up to me at a re-enactment to tell me their daughter’s quilling project won a prize at the State Fair!

Coiled Baskets – These baskets take a little more patience than some of the other projects, but they’re worth it. The core is made of rope (all-cotton clothesline is ideal), and the wrap is left-over bits of yarn, raffia or fabric torn into strips. The directions, which come from my book Around the World Crafts, can be viewed by clicking on the preview in Amazon.
There are plenty more projects in my books and on my website Crafts for Learning — enough to keep you and your kids busy until spring. Happy crafting!
Kathy Ceceri’s Crafts for learning
PROFILE
Crafts for Learning educator Kathy Ceceri is an award-winning author, crafts designer, and teaching artist with a focus on science, technology, history, and art.
She travels throughout the Northeast and around the country presenting hands-on workshops for students, teachers, and families.
In addition to programs at schools, museums, and libraries, she teaches Maker skills for teens through the Albany Medical College STEP program and worked with the Girl Scouts of the USA to develop programs in robotics and cybersecurity.
Her new blog is Kathy Ciceri
Main Research Source
- CABIN FEVER: Recycled Crafts | Wired(24/02/2011)
 What have we learnt?
I was interested in what Kathy had to say about the coin purse:
I also borrowed this idea from a wallet I saw in an upscale design store. Figuring out how to make it just by folding the carton was the real challenge!
She also says in a comment here:
I designed the project for them and drew a prototype of the template the magazine used.