Upcycled Tie Necklace Tutorial
 Mr. Aletha has more ties then I have shoes. I am not even joking. Some of them I love, some I hate, and some of them he hates and then they make there way to the donation pile or to craft land aka my studio. I love ties because of the tiny prints, rich colors, and the beautiful sheen of the silk. But there is not a lot of fabric when they are deconstructed. You could patchwork them, but that can easily turn hippie dippy.
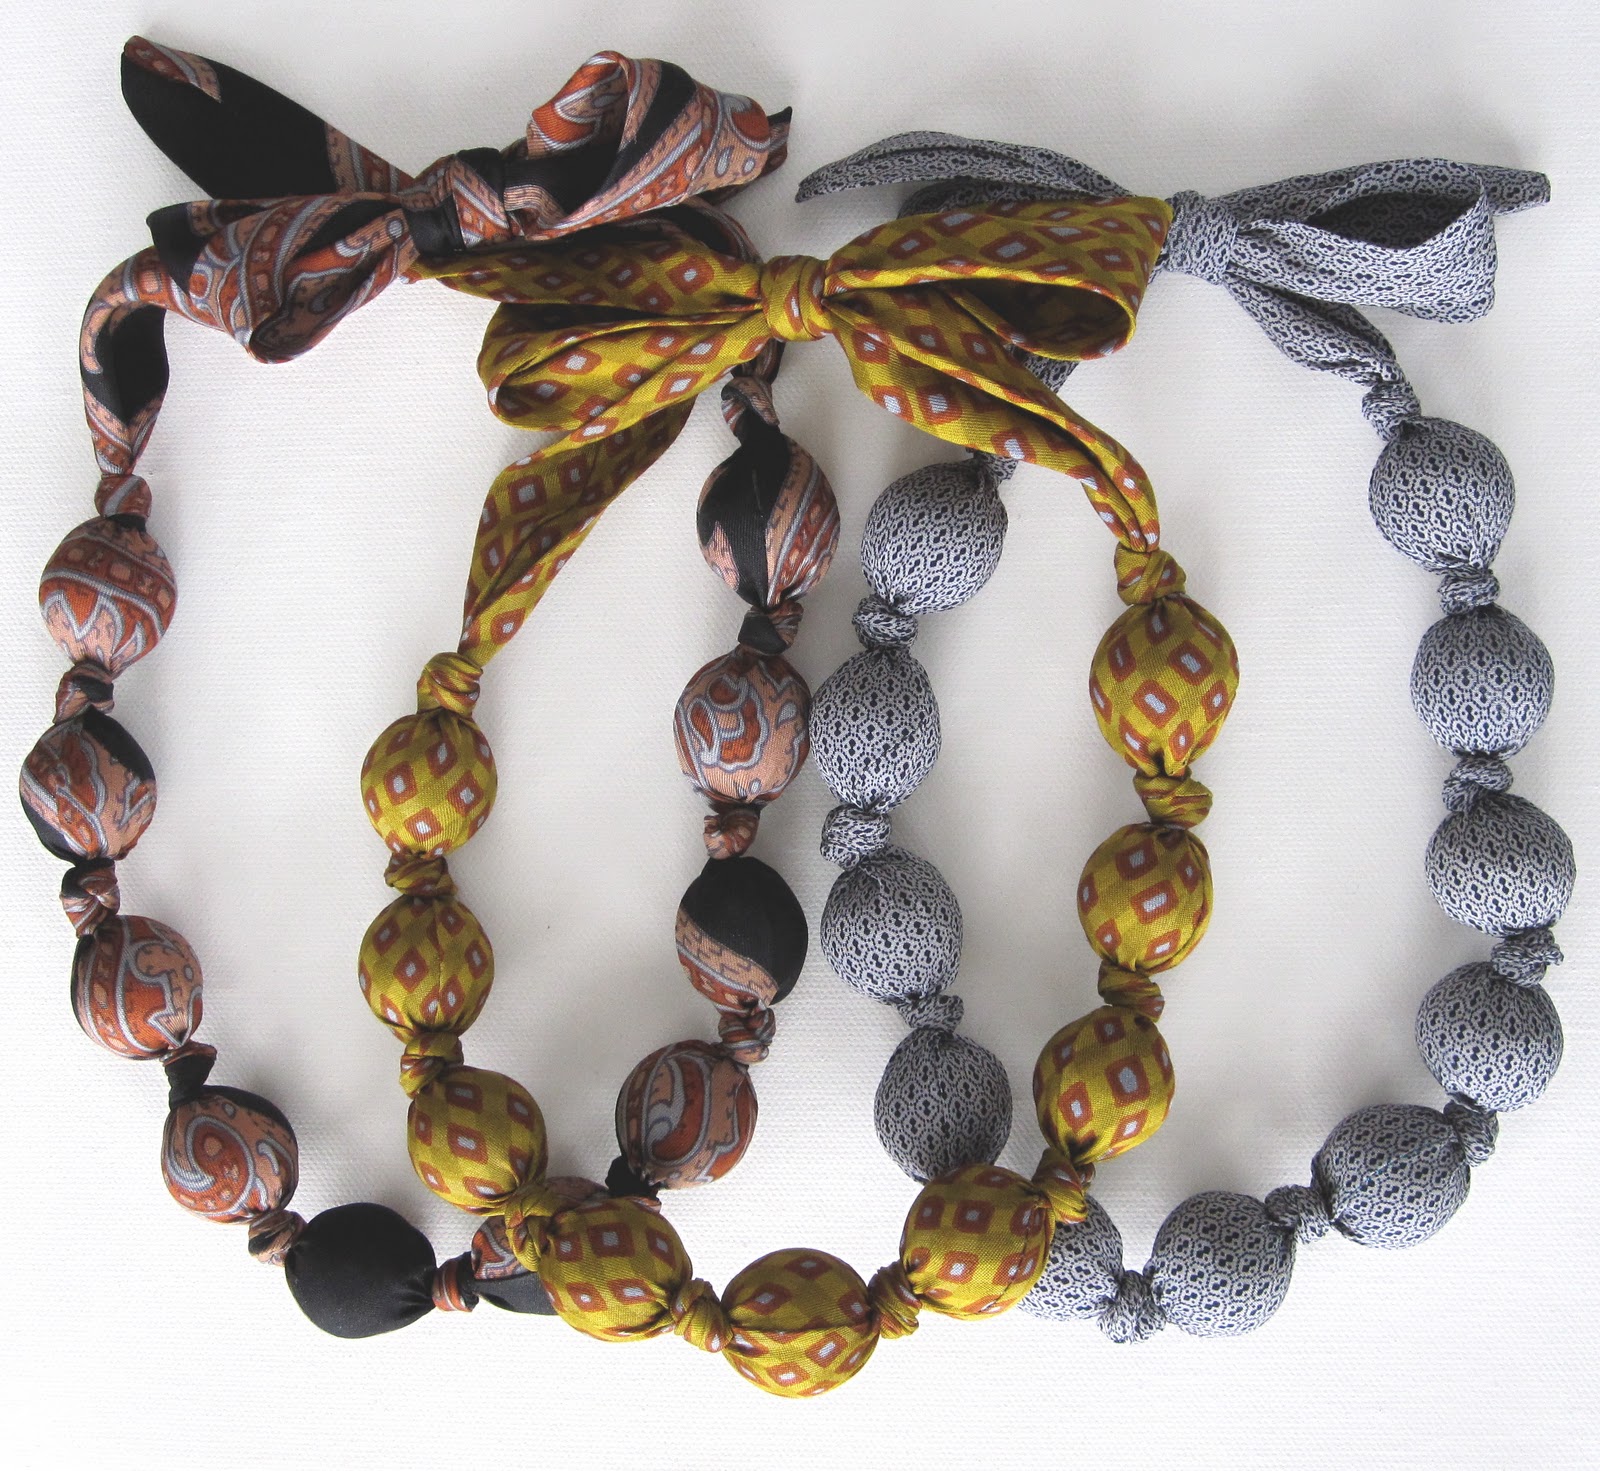
Inspiration hit after purchasing a necklace from Banana for a friend….. I give you-
DIY Tie Necklace Tutorial
These are so quick and easy you can whip one up for every outfit and they are the perfect gift for your hipster friends. Head over the the thrift store if you want to score some really great patterns and colors. Any large beads will work. I found mine at Michael’s (40% of course), this is also the perfect project to deconstruct a cheep, ugly, Mardi Gras Necklace. (BIG BEADS WORK BEST!)
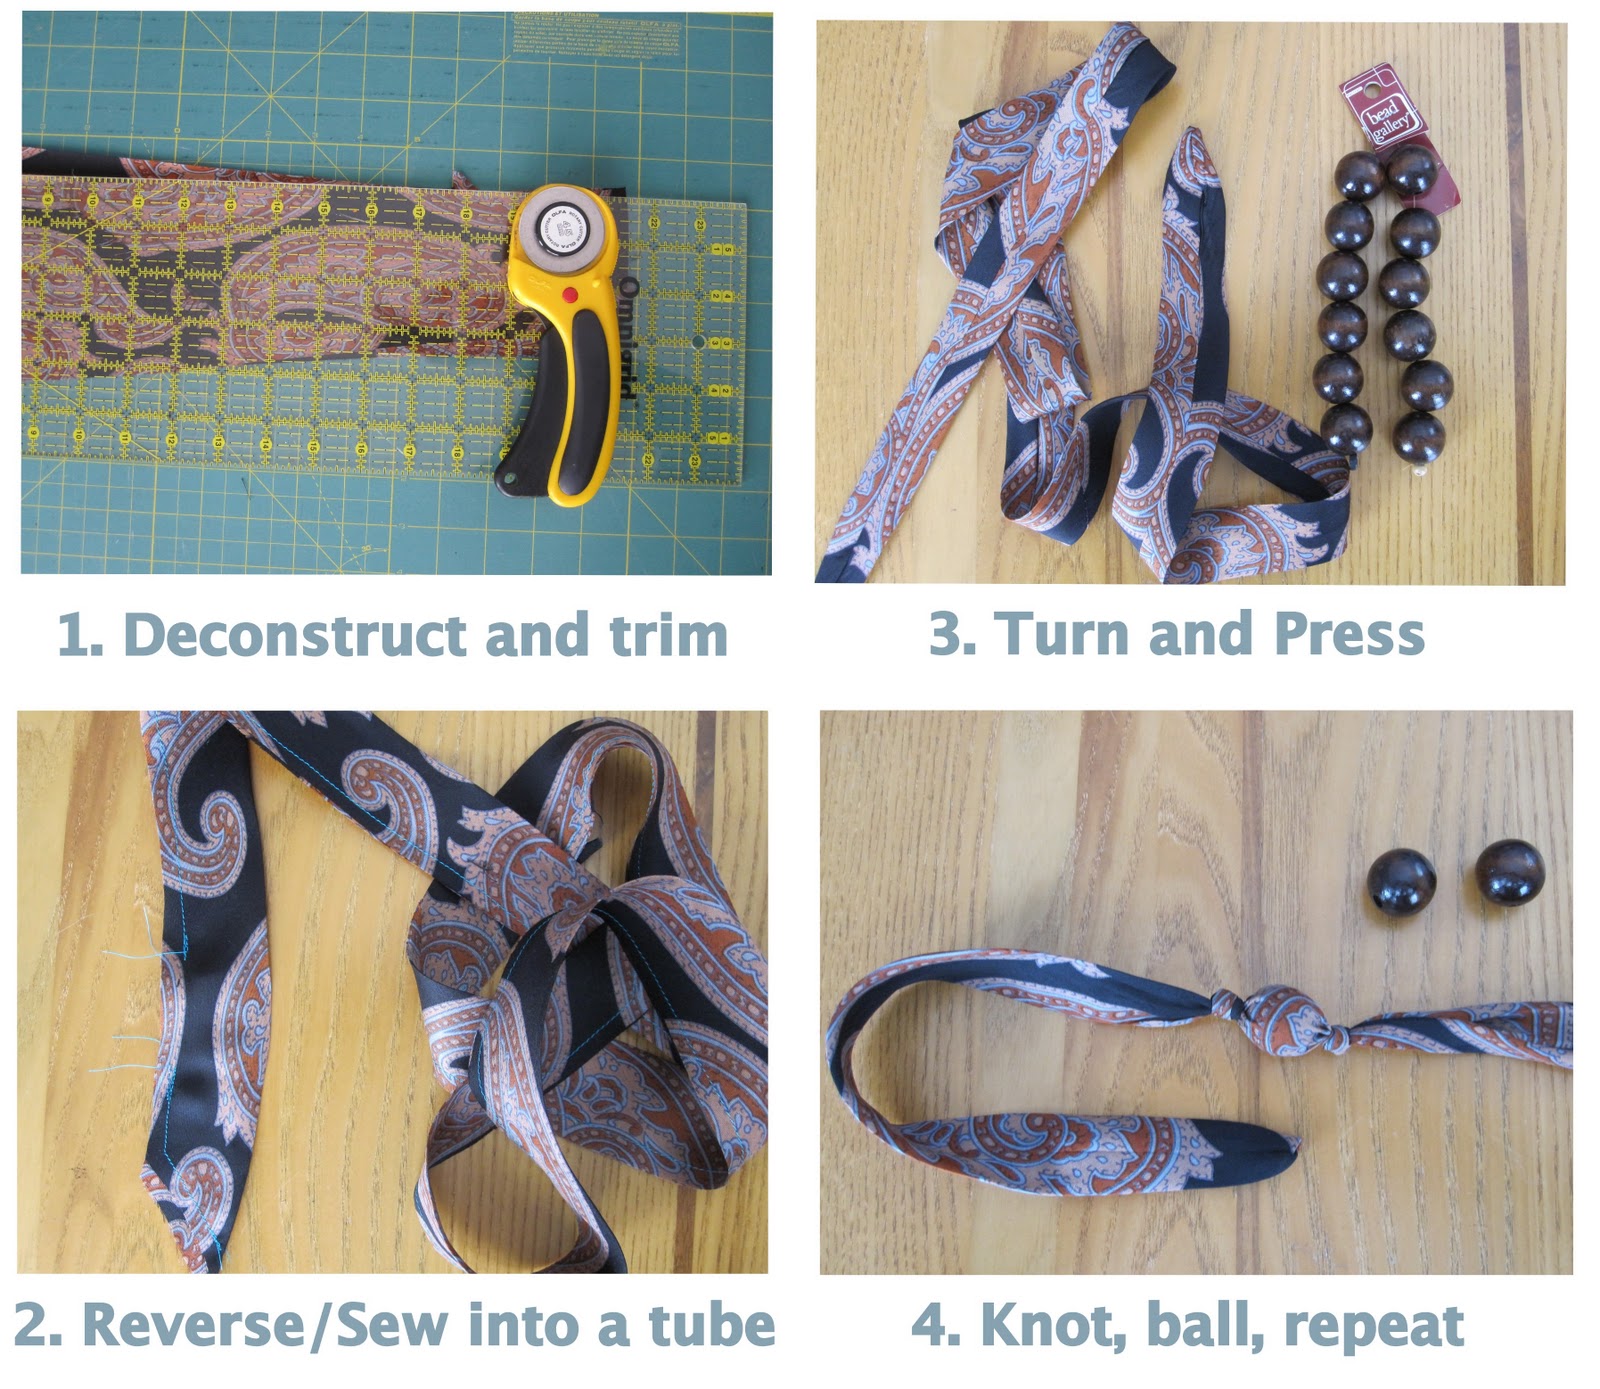
A picture is worth a 1000 words, but for those how might need a few more to get the job done…
1. Deconstruct the tie, starting in the back, carefully split the stitches and then remove the guts. Be careful not to tear or put a hole in the the tie. Iron Flat. Trim into a long strip from tip to tip. Mine was about 3.5″ wide. This will vary from tie to tie. **Note skinny ties won’t work as well and will need smaller beads.
2. Fold in half right sides together. Sew the bottom end closed, and continue around starting down the length of the tie. Stop after about 3″ and back stitch. Skip two inches and start again. (see image 2)
3. Turn right-side out through the opening. Press flat.
4. Tie a knot at about 7 inches and drop in a bead. Knot, drop a bead, repeat about 8 times. I left about 7 inches of space for the bow because I like a big bow and the option to shorten or lengthen the necklace. This will also vary from tie to tie. It will take a bit of trial and error, just move your knots if you need more or less room to keep the ties even. Keep going until you have matching slack on both ends. Hand sew the hole closed.
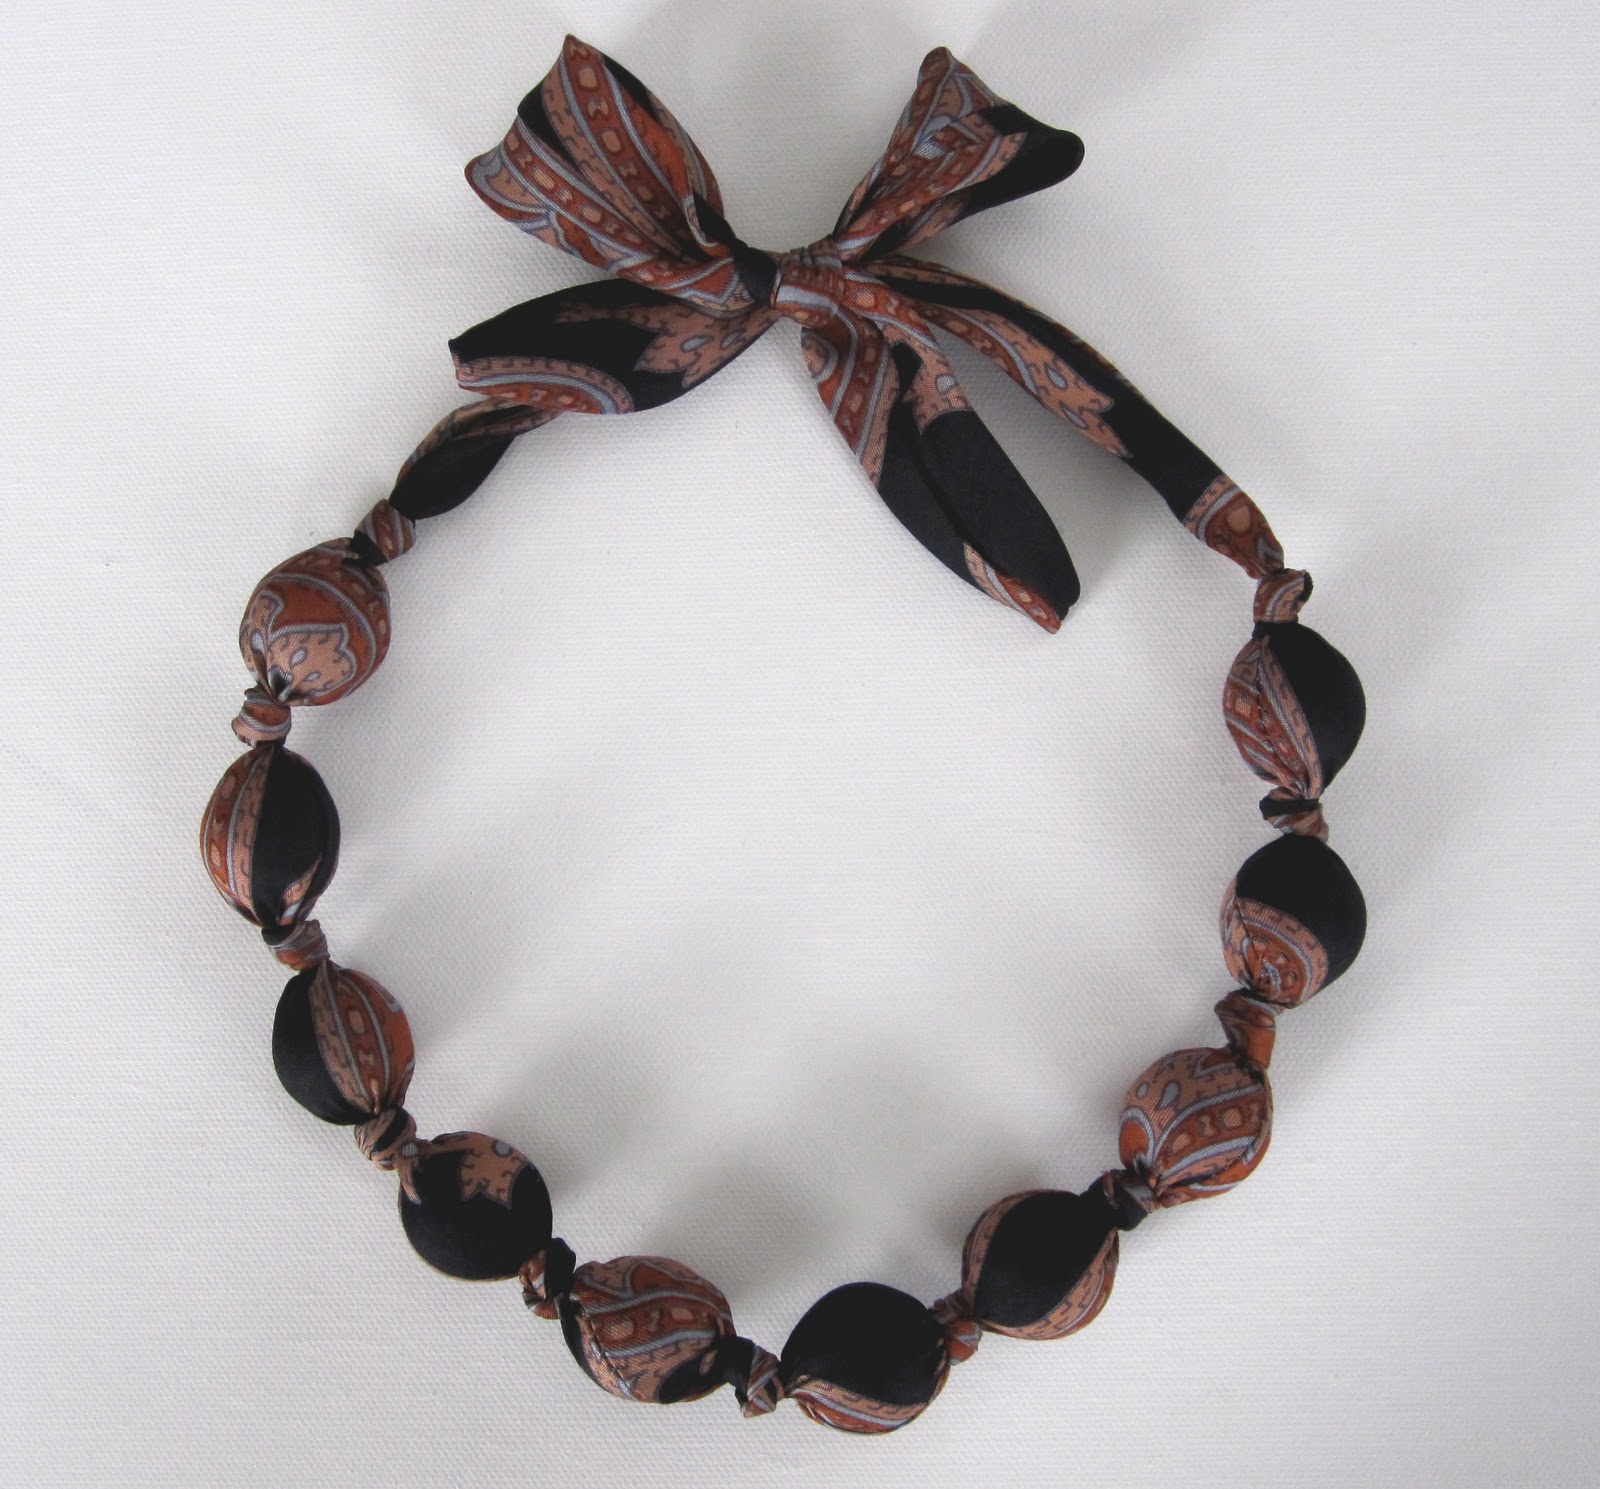
Tie a pretty bow, slip it on and start collecting compliments. The uglier the tie, the prettier the necklace. This DIY repurposing project is quick and easy, but best of all chic. Send me images or links, I love seeing what your making.
Artstar by Aletha, US

PROFILE
The blog of artist Aletha Israels is a showcase of more functional art endeavors that distract her from her professional work, yet still influence it.
Main Research Source
- Upcycled Tie Necklace Tutorial (15/02/2011)