How to Make Necktie Valentines
Two neckties and 10 minutes are all you need to make this cute heart, which makes a perfect V-Day pin.
Sometimes, you need a way to say “Happy Valentine’s Day” in a tailored way, and thrift-store neckties provide a great solution. This project goes together in minutes, and you can use your necktie hearts in lots of ways.
What you’ll need:
- Two coordinating neckties
- Scissors
- Ruler
- Fusible web (see below)
- Hand-sewing needle and coordinating thread
- Iron
- Glue (optional)
- Pin back (optional)
- Blank card (optional)
A note on fusible web: If you’re not familiar with this wonder material, it’s essentially a kind of glue-mesh that you place between layers of fabric. Apply a hot iron, and the layers are fused together. For this project, I’m using double-stick Steam-A-Seam.
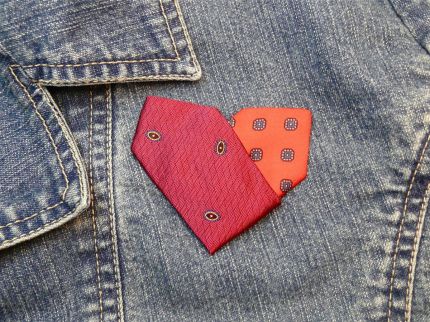
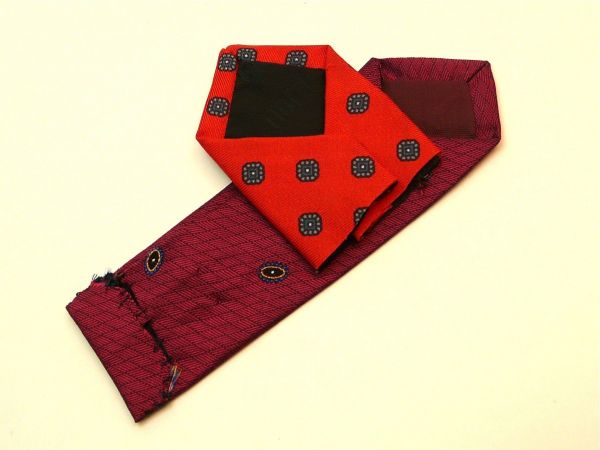
Begin by trimming the neckties. Decide which one will be the most prominent part of your finished heart, and cut it 5 inches from the narrow end. Since neckties vary so much, you’ll need to trim the second tie visually. Lay the cut tie over the second tie as shown. Adjust them so the top of the heart shape looks cute.
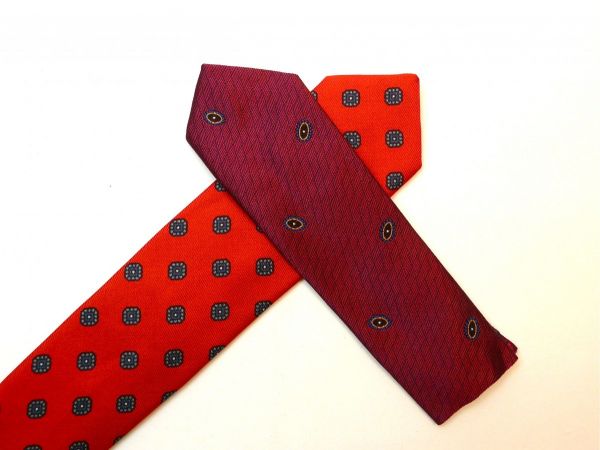
Then, trim that second tie so it’s short enough to tuck behind the first tie, as shown. Once the ties are cut, remove any labels and padding from them both.
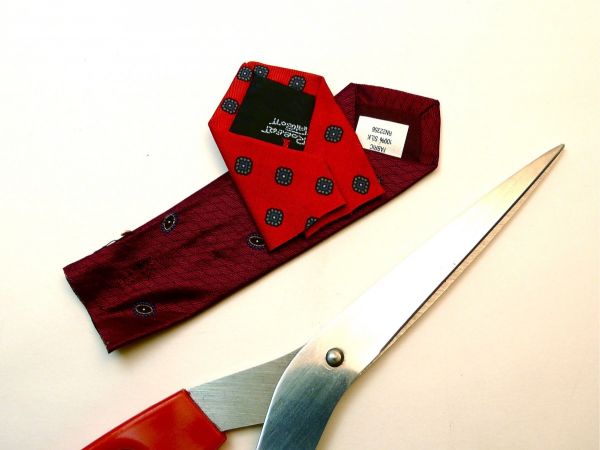
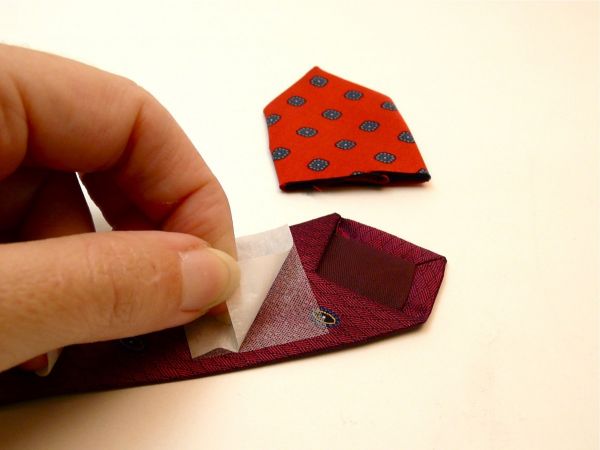
Now to fuse these two pieces together. Cut a small rectangle of fusible web-it should be small enough that no fusible web will stick out beyond the ties. Peel off one side of the paper backing and place the fusible web on the back of the longer tie, following the placement you see here. Then, peel off the second paper backing.
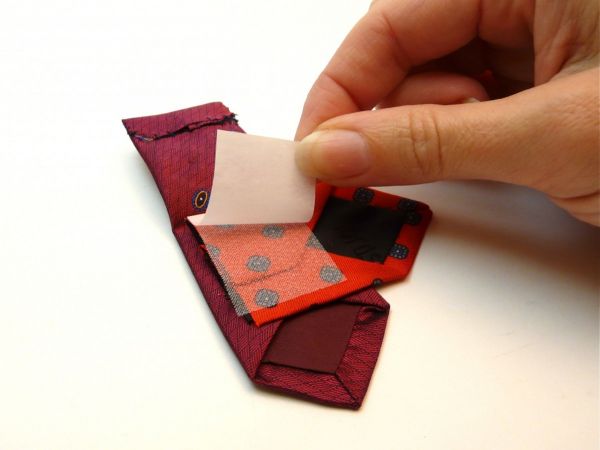
Place the shorter piece of tie on top of the fusible web, also with the back side facing up, as shown. Make sure that the cut edge of the short tie is 1/8 inch away from the edge of the long tie, as you see here. Double-check the placement of the ties from the front at this point-make sure they’re positioned so they form a nice-looking heart.
The great thing about this double-stick fusible web is that it gently sticks the ties together, but you can easily reposition them at this stage. Once you iron them, however, they’re permanent, so make sure you like the look before you iron!
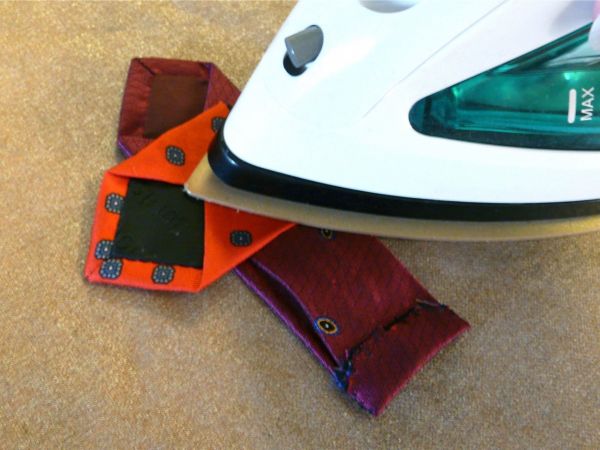
Follow the package directions on the fusible web to fuse the two ties together.

Fold the long tie over the short one to complete the heart. Fuse this fold in place.
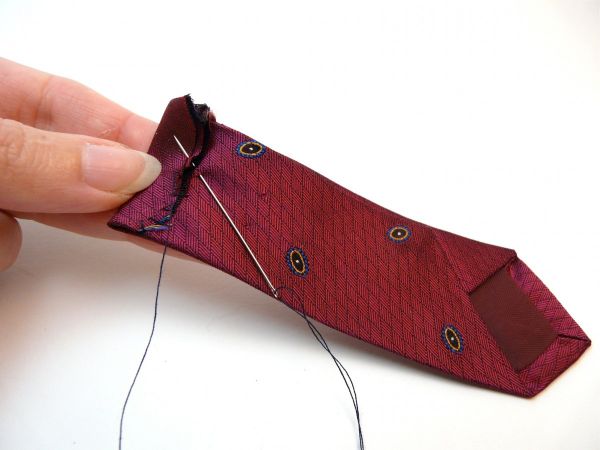
Hand-stitch the folded edges of the finished heart together.
As a last step, I like to hand-stitch around the edges of the longer tie to bind the folds together, using a slip stitch. If you’re sewing-phobic, you can skip this step.
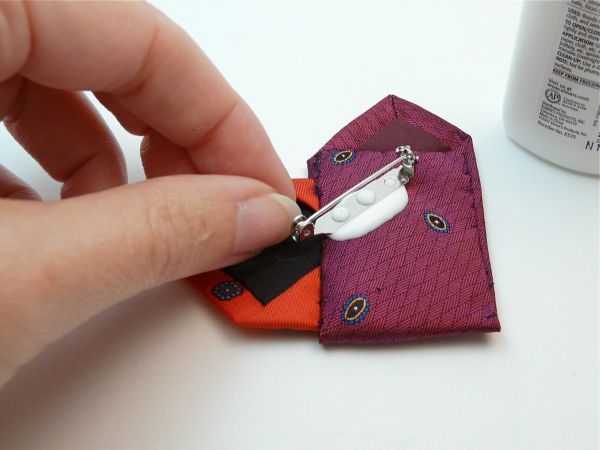 Glue on a pin back or glue to a card-or anything else you can think of!
From this point, the sky’s the limit. You can glue on a pin back, as shown here, or glue your heart to a blank card, or use it for an appliqué. What other uses can you come up with?
CraftyPod, US

PROFILE
The blog of Diane Gilleland 2005-2015.
I make lots of things. That’s what I wrote about here from . What remains is a small selection of “greatest hits.” Thanks for stopping by!