No-Cost Crampons
As winter rolled around, I got tired of slipping on icy pavement while getting to and from classes. I looked at purchasing a pair of inexpensive crampons, but the product reviews for most of them complained of the rubber pieces snapping. The nicer ones used spikes instead of chains, and I wanted something more low-profile.
Essentially, I wanted crampons that were:
- Inexpensive to make
- low profile and without spikes, so that if I accidentally walked inside with them they would not scratch the floor
- Easy and quick to slip on and off so that I could effectively use them to get to and from class without being late because I had to put on crampons.
So, I set out to make my own to meet my needs. I looked at a few instructables (and even attempted to make a few a while back, those weren’t my best instructables) and came up with an even better design that combines these two instructables:
Backpack Cargo net from Inner tubes
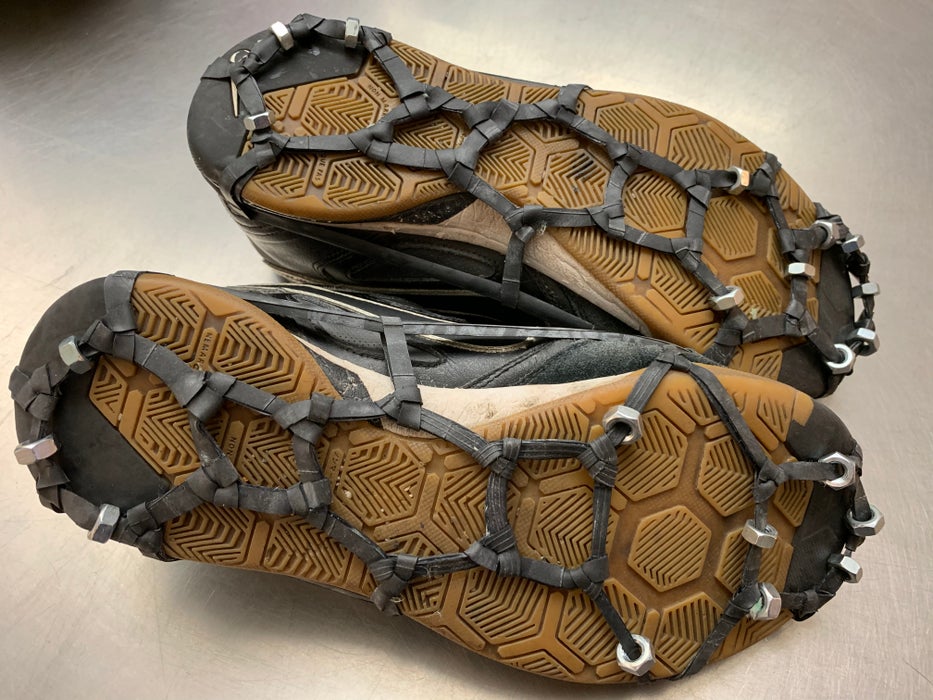
The finished crampons cost me nothing to make, and work great!
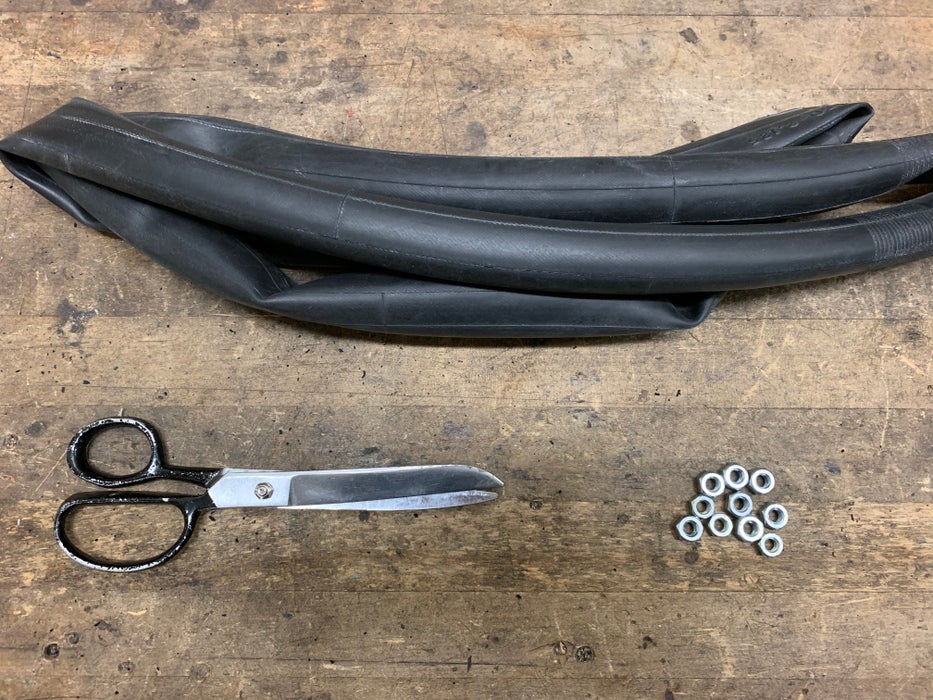
You’ll need:
Old bike inner tube. I used a 26×1.95, but another size will do. You can often get old popped ones by asking nicely at bike shops.
Scissors
Nuts. You’ll need about 20, and preferably they should be all the same size.

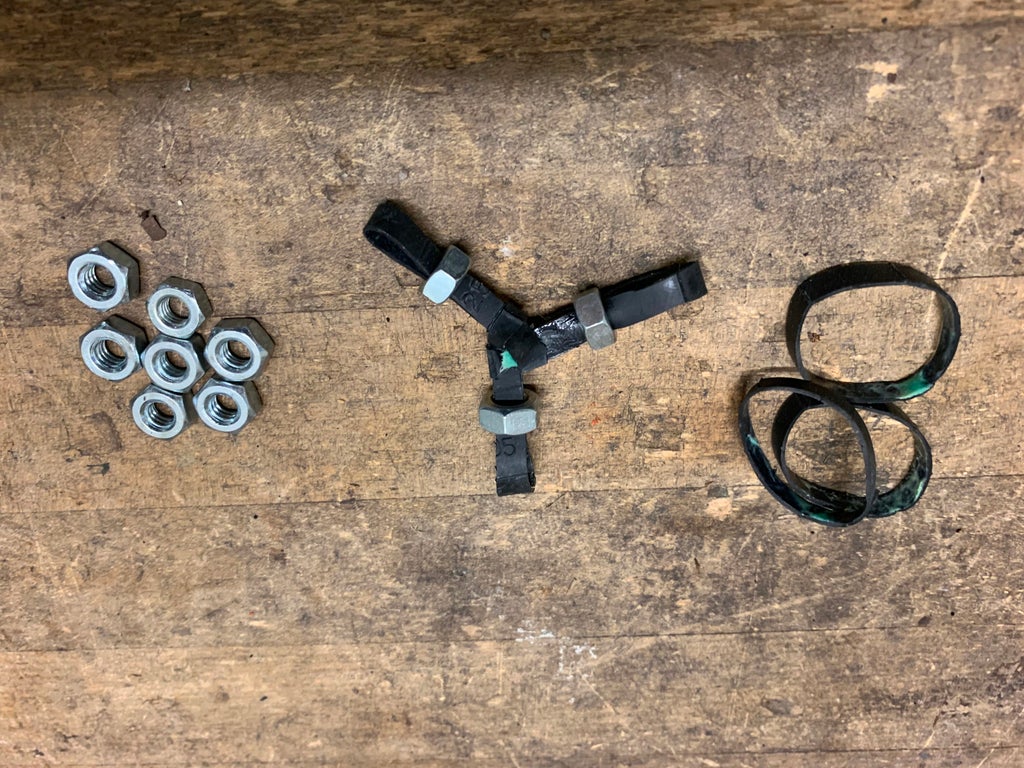
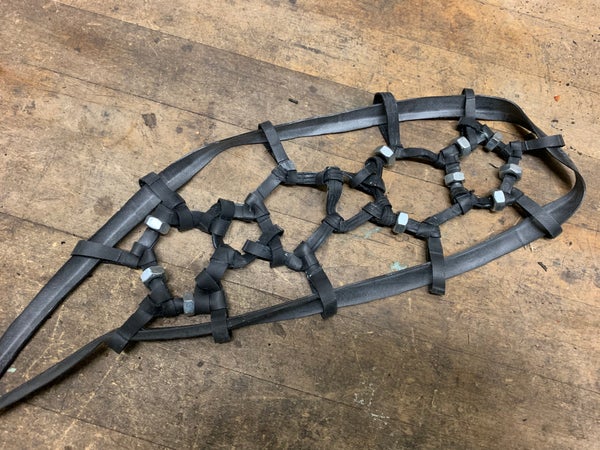
Step 1: Cut the Inner Tube Into Bands
Use your scissors to cut the tube into thin bands. Keep in mind that the bands must be thin enough to be threaded through your nuts. Don’t cut the whole tube up though; you’ll want to save some to cut into long strips for a later step.
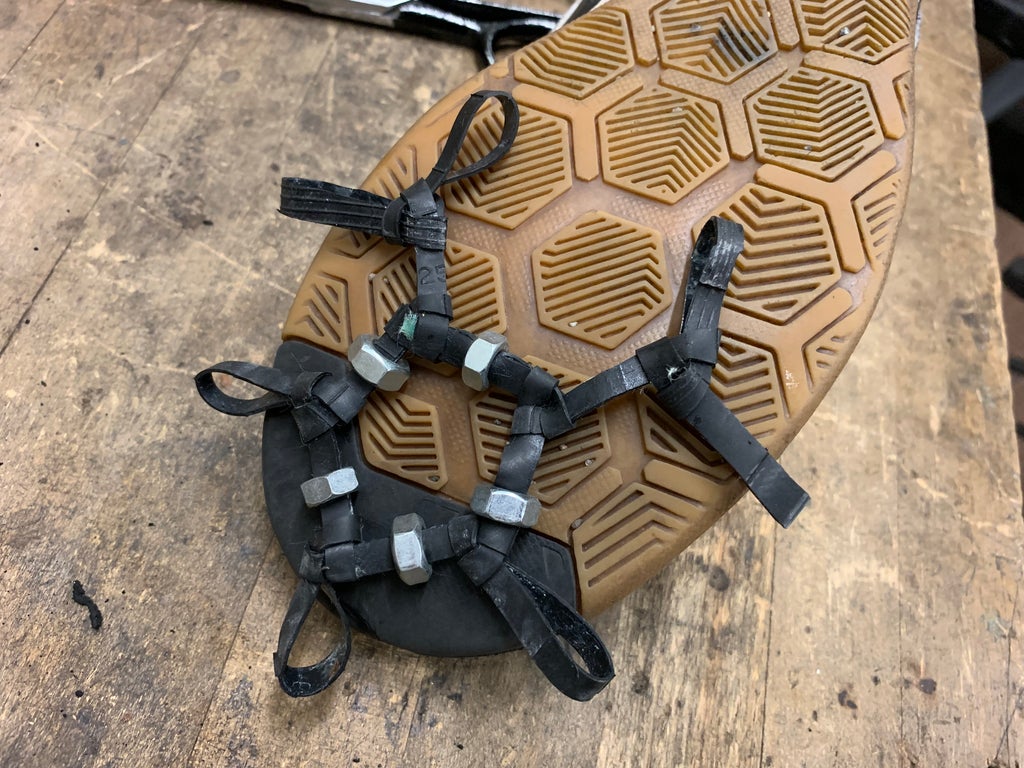
Step 2: Start to weave
I won’t explain how to weave the inner tube, but here’s the instructable where I learned it from.
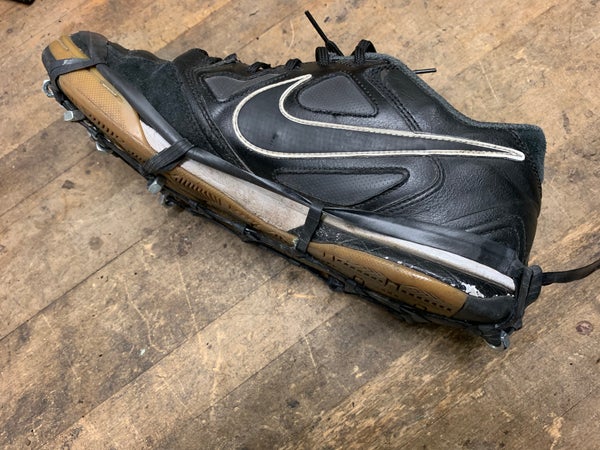
The natural pattern of this weave is benzene-like hexagons, but you can make it into pentagons or squares, all depending on the shape of your foot. From time to time, put what you’ve woven so far on the sole of the shoe to see where you need to add more. Thread on the nuts where you want them. I put most up on the toes, and three on the heel.
You’ll want the loose ends of the bands to hang no more than about halfway over the edge of the sole; this will allow them to stretch over the top of your shoe, keeping them in place.

Step 3: Loop Around the Net
Once you have your footprint all woven, cut a long strip of the inner tube, and loop it through all the loose ends of the bands. Then tie it off in a regular square knot. You’ll want to be tight so that the whole thing “curls” up a bit, so that when you stretch it over your shoe it will be tight enough to hug the perimeter of your shoe.
Step 4: (Optional) Tie a Strap Across the Top

If you want, you can tie a strap over the top of the shoe. This will make the crampons stay on better, but will make them harder to put on.
You can glue Velcro on the strap that will make them easier to put on.
Step 5: One Down, One to Go…
Now you’re done with one of the crampons! Now just repeat the exact same thing for the other shoe.
Now you have your own crampons for much cheaper, and arguably better quality, than if you had bought them from a store!
Disclaimer: These are not guaranteed to keep you from slipping on ice; but rather a preventative measure. I am not responsible for any injury from the use of this instructable.
Instructables

PROFILE
Instructables is a a web-based documentation system allowing the community to document, and share creations.
Established in 2006, and has gone on to grow from a modest hundreds of projects to over one hundred thousand.