How to do visible mending
We’re all about sustainability here at Mollie and are big believers in fixing your clothes not chucking them away! Say goodbye to fast fashion by learning the art of visible mending.
Visible mending is when you fix a garment (whether it’s a hole in a sock or a rip in your jeans) but keep the repairs visible. There’s something beautiful about visible mending. It’s the opposite of hiding away your mistakes and imperfections instead, fixing problems with handmade decoration that makes the garment look even better! Whether that’s through sashiko embroidery or Kintsugi, visible mending adds a whole new dimension to your pieces and will save your pennies and the planet.
So how do you mend visibly and fix a hole in your clothes? Flora Collingwood-Norris’ colourful tutorial will teach you how to fix holes with her visible mending tutorial.
Materials
- Knitwear with a hole
- Darning yarn in different colours
- Tapestry needle
- Sewing needle

You Will Need
- Needle
- Thread
- Scissors
Total time:
An afternoon
Step 1
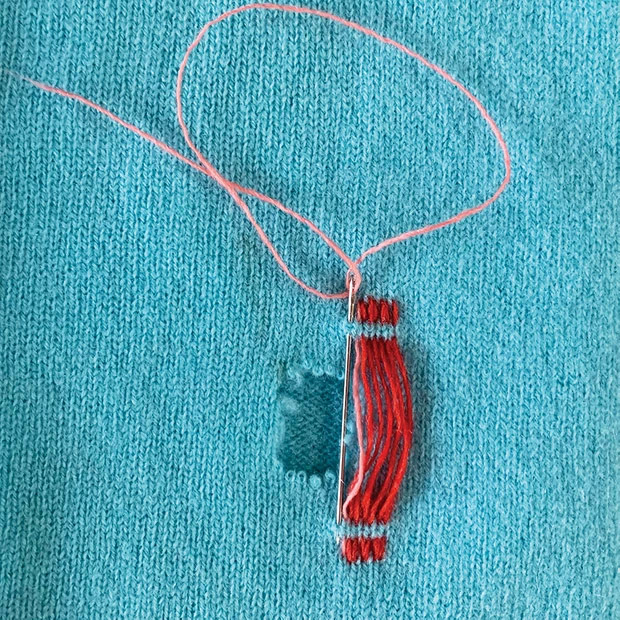
Position your knitwear with the hole facing up. Leaving a good amount of room around the hole to prevent any further unravelling, thread the sewing needle with the first coloured yarn, then bring it up from the inside of the jumper, above the hole and to the right. Take the needle back down roughly 0.5cm (1⁄4″) along, bring it back up 0.25cm (1/8″) along, then take it back down over the other side of the hole. Repeat the same process of going under, over, then under the fabric again, as shown, to create the first row of mending.
Step 2
Bring the needle up next to the bottom of the first stitch, half a knitted stitch over, then repeat step 2, this time sewing upwards. Repeat for a few rows, making sure the threads don’t pull on the fabric or become loopy. Cut the yarn, leaving a tail for weaving in.
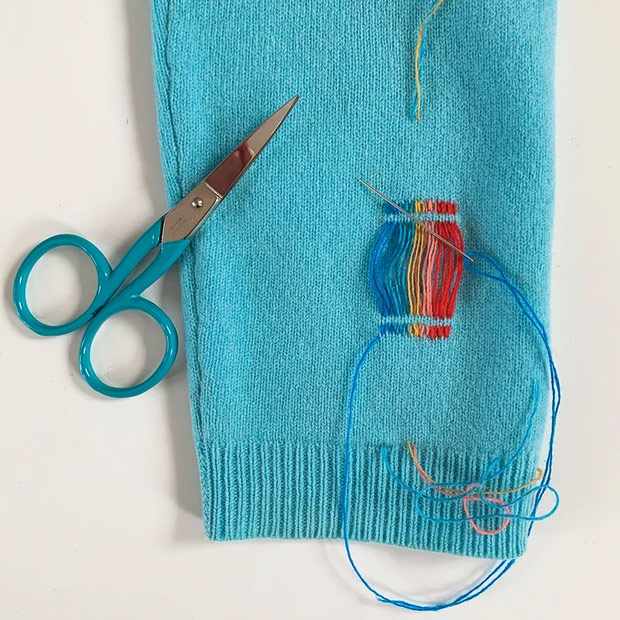
Step 3
Repeat steps 1-2 with another yarn, then continue with the other colours until the hole is completely covered.
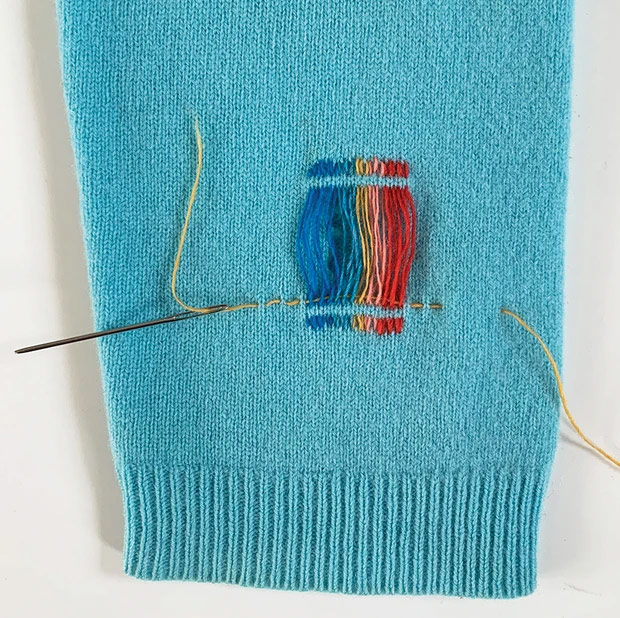
Step 4
Thread the tapestry needle and repeat step 1 across the bottom of the mending, using the image as a guide to placement, and this time taking the needle over the first row of mending, under the second, over the third, and so on. Bring the needle back up half a knitted stitch over, then on the next row weave over the threads you went under, and under those, you went over.
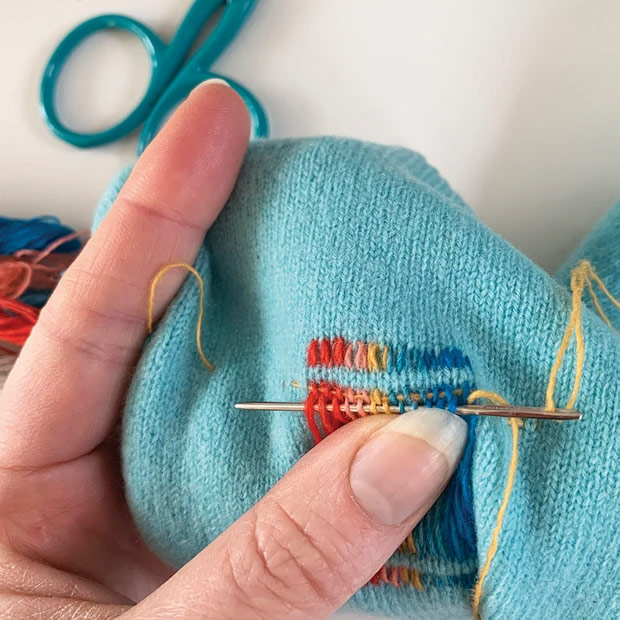
Step 5
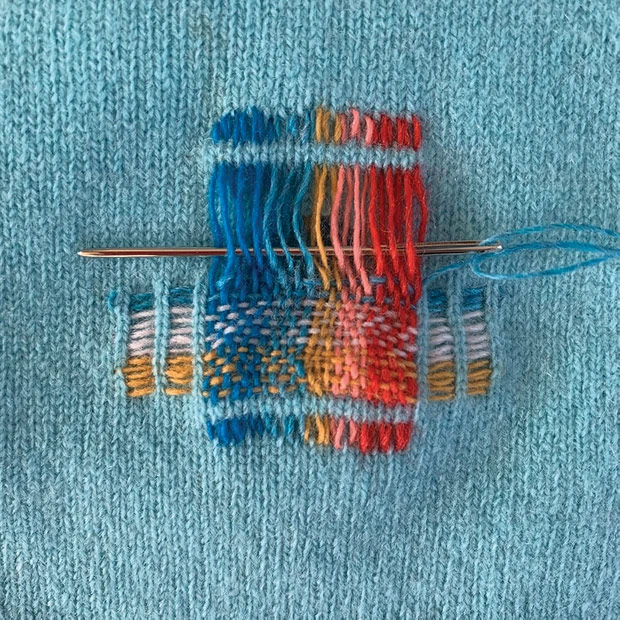
Repeat until all the centre rows of visible mending have been woven over, switching yarn colours as you go.
Step 6
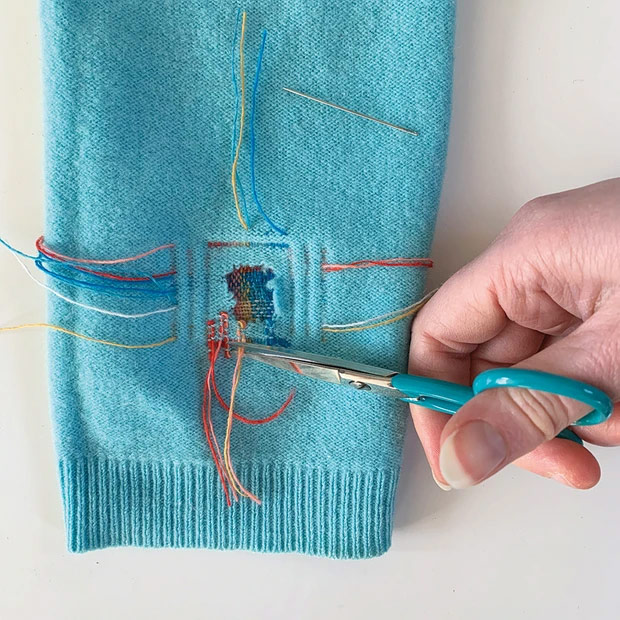
To finish, turn the knitwear wrong side out, weave in the ends to secure them, then trim off any excess yarn. You can also use visible mending method to cover over stains or marks.
We hope you’ve enjoyed learning about visible mending and that it has inspired you to fix your own clothes.
Collingwood-Norris, Scotland

PROFILE
Flora is a, a knitwear designer, maker and mender based in Galashiels in the Scottish Borders. Sh’e been passionate about textiles, and knitwear in particular, all her life.
Her passion for mending started after she welcomed a very chewy puppy to the family, and Flora now offers a visible mending service as well as running workshops.
Main Research Source
- How to do visible mending(28/01/2021)